How to Install Lucee on Ubuntu 20.04
For this tutorial, we will assume you have Apache2 and MySQL installed and running. We will also assume that you have an Ubuntu 20.04 server, and are using the ufw firewall.
Lucee installs with Tomcat, which is the web server Lucee relies on. We will setup our Apache server as a proxy server for it. In fact, in order to serve a CFML website, we didn't need to install Apache2, but it is good to have if we want other non-CFML sites on our server. For example, you could decide to run a virtual host using PHP, and that would be set up on the Apache server.
Prerequisites
- You already installed Ubuntu 20.04. If not, start here.
- You have already created your user account with sudo rights. If not, go here.
- You have already sert up the server to require SSH logins. If not, go here.
- The server has your public key installed and you can login with your username. If not, go here.
- You have followed the instructions in Initial Server Setup. If not, go here.
- You have already installed Apache2. if not, go here.
- You have installed and configured Fail2Ban. If not, go here.
- You have installed and configured MySQL. If not, go here.
Terms and Placeholders
| Placeholder | Description |
|---|---|
| SERVERIP | Substitute with the server IP for your server |
| SSHROOTPASS | Substitute with the ssh root password for this server. |
| SSHUSERNAME | Substitute with your ssh (sudo) username for this server |
| SSHUSERPASS | Substitute with your sudo user account's password for this server. |
| MYSQLROOTPASS | Substitute with the MySQL root password |
| MYSQLDBNAME | Substitute with the database name you will use for your Lucee App. |
| MYSQLDBUSER | Substitute with the database user name you will use for the app to access the database. |
| MYSQLDBPASS | Substitute with a password for the database user you created for the app |
| LUCEEADMINPASS | Substitute with a unique password to access the Lucee Admin Console. |
Step 1: Prepare to Deploy
Before starting with the Lucee, your system should be up to date and all installed software is running the latest version.
$ sudo apt update && sudo apt upgrade Step 2: Download and install Lucee & Tomcat
Let's make sure you are in your home directory:
$ cd ~Now we will download Lucee.
$ sudo wget https://cdn.lucee.org/lucee-5.3.8.201-linux-x64-installer.run -O lucee.runYou may have visited the Lucee website, and notice that this is not the newest version. Don't worry, we will upgrade from the admin console later.
Now we need to change the permissions of the file we just downloaded:
$ sudo chmod 744 lucee.runAnd now we run the Lucee installer:
$ sudo ./lucee.runThe first thing you see should be:
----------------------------------------------------------------------------
Welcome to the Lucee Installer.

----------------------------------------------------------------------------
Please read the following License Agreement. You must accept the terms of this
agreement before continuing with the installation.
Simply press [ENTER] to continue. You will now get the license agreement. Press [ENTER] again, the y to accept the license.
You will now see the following:
----------------------------------------------------------------------------
Please specify the directory where Lucee will be installed.

Installation Directory [/opt/lucee]:
Hit [ENTER] to accept the default.
Next, you will be prompted for a password:
----------------------------------------------------------------------------
Lucee Password

Please enter in the default passwords for the Lucee Server Administrator and the
Lucee Web Administrators.

Lucee Password :
Here you should enter the LUCEEADMINPASS noted above. This will be the password you will need later to get into the Lucee Admin Console. Make this a very difficult password, and do not lose this!
Lucee Password (confirm) :Enter the password again to confirm.
Next you will see:
Memory Settings

How much system memory should Lucee be allowed to use? These will be the minheap
and maxheap values assigned to Lucee's JVM.

Minimum (mb) [256]:
Hit [ENTER] to accept the default. Next it will ask for the maximum allowed memory:
Maximum (mb) [512]: Hit [ENTER] to accept the default, or add more if your system has sufficient memory.
next you will be asked for a Tomcat system user. This is the user the Tomcat server will run as. If you do not want to use root, you will need to exit out and make a dedicated account. For the purposes of this tutorial, we will leave this as root.
Tomcat System User

Enter in the System User Account that Tomcat will run under. Running as "root"
or "Administrator" on Windows will avoid system permission problems, while
running as a non-root user will add an additional layer of security. If you
choose to run as a non-root user, we recommend using a easily identifiable
username like "lucee" or "cfml".

 [root]:
Hit [ENTER] to accept the default, or enter a different account name if you created one.
Next we will be asked for ports:
Tomcat Ports

Tomcat needs to reserve "ports" on your computer in order to serve various types
of requests. You can customize those ports using the fields below. If you are
unsure, the default values provided below are perfectly safe to use.

Tomcat Web Server Port: [8888]:
Hit [ENTER] to accept the default.
Tomcat Shutdown Port: [8005]: Hit [ENTER] to accept the default.
Tomcat AJP Port: [8009]: Hit [ENTER] to accept the default.
Now we are asked if we want to start Lucee whenever the system boots:
Start At Boot?

Do you want Lucee to start up automatically whenever the system boots up?

Yes, Start Lucee at Boot Time [Y/n]:
Hit [ENTER] to accept the default of Y
And now it will ask if you would like to install an Apache Connector that will allow you to run Apache in front of Lucee.
Install Apache Connector?

This option will install mod_proxy_http so that you can utilize Apache as a web
server in front of your Lucee installation. This option is recommended if you're
using Apache.

Yes, Install Apache Connector [Y/n]:
Hit [ENTER] to accept the default of Y
Next it will ask for you to install mod_cfml. This makes it so that whenever you create a virtual host for Apache, it also creates one in TomCat, allowing Lucee to parse the CFML in the pages.
Install modcfml?

The mod_cfml adaptor helps make system administration easier by automatically
creating new hosts in Tomcat whenever you add a new host to your web server. To
learn more about mod_cfml, visit its website at modcfml.org. This option is
recommended for most environments.

Yes, Install mod_cfml [Y/n]:
Hit [ENTER] to accept the default of Y
Now it will ask for some paths, and the default should be fine:
Apache Control Script Location

Please enter the location of your apache control script. The default location
for this script is "/usr/sbin/apachectl".

Apache Control Script Location [/usr/sbin/apachectl]:
Hit [ENTER] to accept the default.
Apache Modules Directory

Please enter the directory that apache stores it's modules in. By default, this
directory is located at "/usr/lib/httpd/modules/" for RHEL/CentOS, and
"/usr/lib/apache2/modules/" for Ubuntu. For 64-bit systems, try changing the
"lib" directory to "lib64".

Apache Modules Directory [/usr/lib/apache2/modules]:
Hit [ENTER] to accept the default.
Apache Configuration File

The Apache configuration file controls how Apache processes incoming requests.
The default location of the Apache configuration file is
"/etc/httpd/conf/httpd.conf" on RHEL/CentOS and "/etc/apache2/apache2.conf" on
Ubuntu.

Apache Configuration File [/etc/apache2/apache2.conf]:
Hit [ENTER] to accept the default.
Apache Logs Directory

Please enter the directory that Apache stores it's log files in. By default,
this directory is located at "/var/log/httpd/" for RHEL/CentOS, and
"/var/log/apache2/" for Ubuntu.
Hit [ENTER] to accept the default.
Finally Lucee is ready to install...
Setup is now ready to begin installing Lucee on your computer.

Do you want to continue? [Y/n]:
Hit [ENTER] to accept the default of Y.
Be Patient Here
The installer has a progress counter that gets to 100% much faster than reality. It may take some time to complete, but when you are done, you should see this:
Please wait while Setup installs Lucee on your computer.

 Installing
 0% ______________ 50% ______________ 100%
 #########################################

----------------------------------------------------------------------------
Setup has finished installing Lucee on your computer.
Now let's clean up and delete the installer:
$ sudo rm lucee.runStep 3: Optimizing Lucee
You probably want to see if it is running, but we actually still have some work to do. We need to mi=onidy some settings to make sure it starts up quickly, and then we will need to open some firewall ports.
First we will make some changes in the TomCat settings:
$ sudo nano /opt/lucee/tomcat/conf/context.xmlNow scroll down to the and of the file, and just above </Context>, insert this line:
<JarScanner scanClassPath="false" />So now the last two lines of the file should look like this:
<JarScanner scanClassPath="false" />
</Context>
Now save the file by hitting [CTRL-X] then Y, then [ENTER]
Now we need to edit the catalina.properties file:
$ sudo nano /opt/lucee/tomcat/conf/catalina.propertiesAt around line 97, there is a setting declared like this:
tomcat.util.scan.StandardJarScanFilter.jarsToSkip=\Comment that line out by putting a # at the beginning, and add the following line right beneath it:
tomcat.util.scan.StandardJarScanFilter.jarsToSkip=\*.jarNow those two lines should look like this:
# tomcat.util.scan.StandardJarScanFilter.jarsToSkip=\
tomcat.util.scan.StandardJarScanFilter.jarsToSkip=\*.jar
Now save the file by hitting [CTRL-X] then Y, then [ENTER]
Next we need to install and configure “haveged"
$ sudo apt install haveged -yWhen done, start the haveged service:
$ sudo systemctl start haveged.serviceAnd make sure it starts automatically when your server boots:
$ sudo systemctl enable haveged.serviceFinally, let's restart Apache and Lucee:
$ sudo systemctl restart apache2.service$ sudo /opt/lucee/lucee_ctl restartStep 4: Opening Firewall Ports
We will need to open a firewall port for Lucee:
$ sudo ufw allow 8888Step 5: Checking If it Works
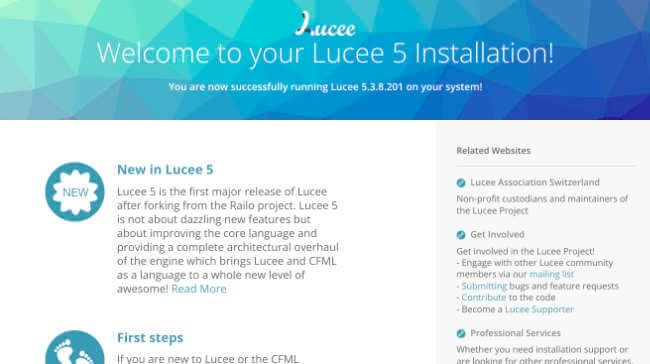
OK, let's see if we have a Lucee Server running! Open a web browser and put in your ip address, followed by a colon and 8888:
http://SERVERIP:8888If all went well, you should see a public facing page:

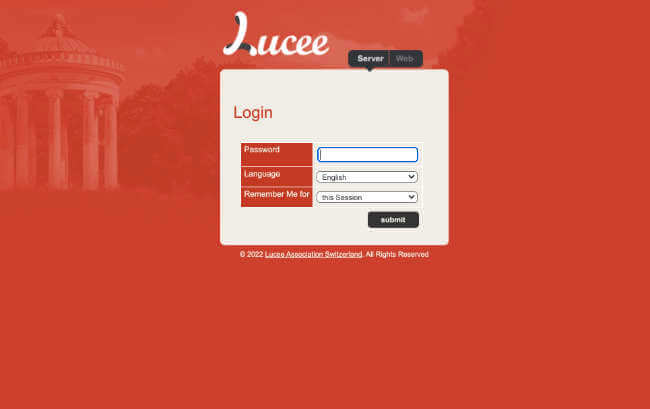
Now let's see if the administration console is working:
http://SERVERIP:8888/lucee/admin/server.cfmYou should see this:

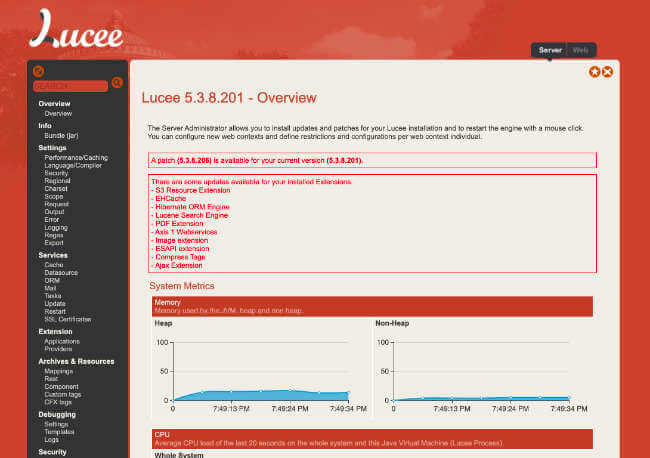
Enter the password you used in the setup that we referred to as LUCEEADMINPASS and login.
You should see something similar to this:

Now we need to do some updating!